For years, Julia admired kitchens in magazines especially the ones featured in Architectural Digest. Among the high-end appliances and gleaming marble countertops, one detail always stood out: the pot filler. A graceful, swing-arm pot filler faucet mounted above the stove, making it easy to fill pots right where you cook. To Julia, it was the definition of practical luxury both stylish and smart.
Every time she boiled water for pasta or soup, she’d imagine how much easier life would be with a kitchen pot filler. No more lugging heavy, water filled pots from the sink to the stove. But for a long time, the idea stayed tucked away. “It’s a splurge,” she told herself. “It’s just something you see in show kitchens.” Then came her long awaited kitchen remodel. As she stood in the middle of the dusty, half gutted room with her contractor, picking finishes and layouts, the memory of that elegant pot filler faucet resurfaced. This was her chance.
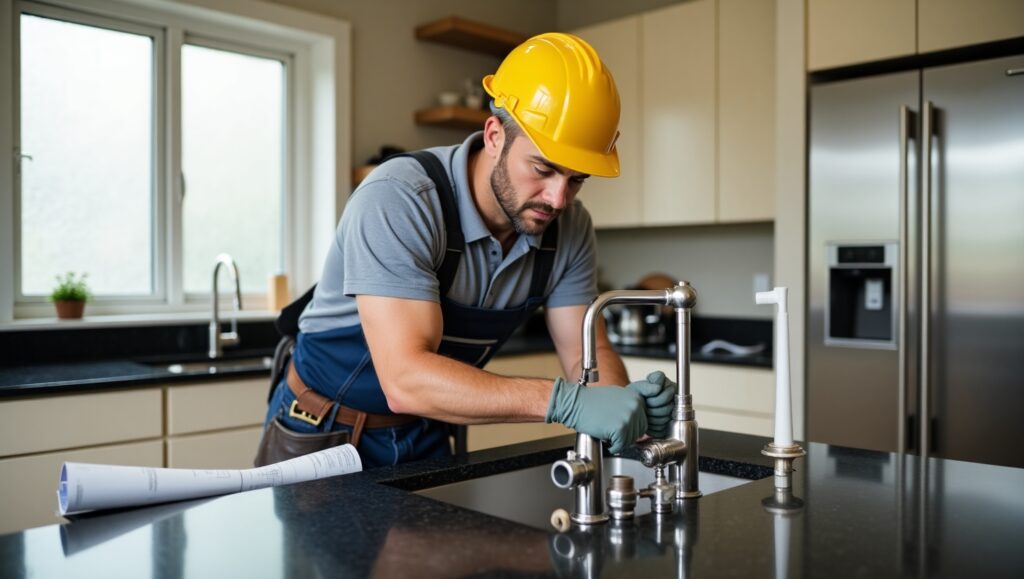
She asked, hesitantly, “Would it be crazy to add a pot filler over the stove?” Her contractor smiled. “Not crazy at all. You’ll just need Fast Plumbing and Drain to run a water line. Want me to bring them in?” A few days later, the plumber was on-site. He assessed the wall behind the new range, explained the best approach for installing a pot filler, and determined the right pot filler height based on the range model and backsplash. He also installed a dedicated shut-off valve to ensure safe and reliable pot filler installation.
In just a few hours, it was done the swing arm faucet mounted and perfectly aligned. It extended effortlessly across the stove and retracted with a smooth glide. Julia couldn’t stop smiling. It looked like it belonged in a magazine spread.
When the renovation was complete, her kitchen looked stunning. But more importantly, it felt complete. Every time she reached for her pot filler kitchen fixture whether filling a pot for tea, pasta, or soup it was a reminder that installing a pot filler faucet wasn’t just about convenience. It was about creating a space that worked for her life. Now, every time she spots a pot filler faucet in a magazine, she smiles not with envy, but with pride. She has one of her own. And it’s even better than she imagined.
Installing a pot filler faucet might look simple on the surface, but it’s usually beyond the ability of a typical do-it-yourselfer for several good reasons:
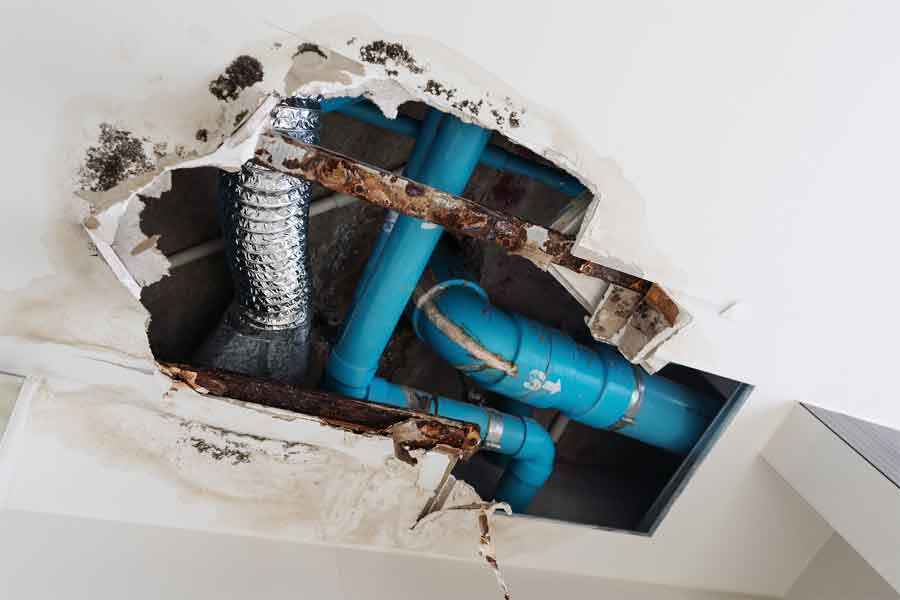
Most kitchens do not have a cold water line running behind the stove. Installing one involves cutting into walls, locating the nearest supply line (often under the sink), and routing new plumbing through framing. This can require opening drywall, drilling through studs, and snaking pipe across difficult angles—work that takes experience to do cleanly and safely.
Pot fillers sit high above countertops, so water pressure must be carefully controlled to avoid splashing or leaks. A dedicated shut-off valve is typically required near the source to prevent pressure buildup, especially if the fixture goes unused for long periods. We ensure these valves are installed correctly and meet local codes.
Wall-mounted faucets must be perfectly level and secure, especially since pot fillers swing in and out. Supporting the faucet often requires adding blocking behind the drywall—something most DIYers aren’t equipped to handle without full wall access.
Pot fillers are connected to a potable water source and must follow local plumbing codes regarding backflow prevention, shut-off access, and pipe materials. We know and follow these codes to avoid future issues or inspection problems.
A leak behind a stove could go unnoticed for weeks, causing damage to cabinets, drywall, or flooring. Professional plumbers test for leak-proof connections and ensure the faucet functions reliably before sealing up the wall.
Hire Fast Water and Drain. Installing a pot filler is part plumbing, part finish work, and part code compliance. For a fixture that’s both visible and high-pressure, it’s worth doing right the first time—by a licensed plumber.
Fast Pluming and Drain’s process for installing a whole-house water filtration system is methodical, precise, and tailored to the home’s plumbing layout and the specific filtration system. Here’s a step-by-step breakdown:
Evaluate the plumbing layout by determining the best location—typically near where the main water line enters the home. Check water pressure and quality, which may include installing a pressure regulator, sediment pre-filter, or bypass valve. Next, shut off the main water supply and open faucets to relieve pressure. Finally, confirm compatibility with local plumbing codes and verify permit requirements if needed.
Our tools may include: pipe cutters (for PVC, copper, or PEX), fittings, unions, valves, teflon tape, pipe sealant, mounting hardware, drill, level, wrench set, and possibly a torch (for copper lines).
Mark and cut into the main water supply line. Then, dry-fit the filtration system and components, checking for proper alignment and space. Install shut-off valves and a bypass loop.
Securely mount the filter housing or bracket to a wall stud or support brace to prevent strain on the pipes. Ensure the filter is installed in the correct direction of flow (inlet vs. outlet).
Connect the inlet and outlet of the filter to the existing water line using the appropriate fittings (PVC cement, soldering, PEX crimping, or compression fittings). Tighten connections and apply sealant where needed to prevent leaks.
Turns on water gradually, watching for leaks at all connections. Open faucets to purge air from the system. Observes for any pressure drop or abnormal noises.
Run water through the filter per the manufacturer’s instructions to flush out carbon fines or debris. This takes several minutes, especially for new carbon-based filters.
Label shutoff and bypass valves clearly for future maintenance. Provide guidance on how and when to change filters, where to shut off water in case of emergency, and any maintenance tips or manufacturer instructions.
Fast Plumbing and Drain ensures the whole-house filtration system is installed securely, leak-free, up to code, and optimized for performance. The process is faster, cleaner, and more reliable than DIY—especially for systems that connect to the main water line.

We ensure quality service, offer guarantees, and provide ongoing support. Here’s what we do:
We provide a warranty on our workmanship. If there are installation errors or faulty work, it will be corrected.
We install reliable, energy-efficient plumbing components from reputable brands. We use manufacturer-approved parts to ensure longevity and performance.
We ensure the equipment is installed to the manufacture’s specifications, preserving the warranty.
We test the system post-installation to confirm proper operation. We then check for issues and seals before completing the job.
We provide customers a detailed invoice outlining the work performed, parts used, and warranty terms.
We encourage customers to enroll in our preventative maintenance plan for ongoing tune-ups and priority service.
We check in with customers after installation or repair to ensure satisfaction. We also offer 24/7 emergency support in case of urgent issues.
We stay up to date with state plumbing licensing through the Washington State Department of Labor & Industries and the Uniform Plumbing Code, and ongoing training.
By backing up our customers, we provide peace of mind and ensure long-term satisfaction with our work.
We’re a second-generation business with over 40 years of on-the-job experience. Our deep knowledge means we diagnose and solve problems faster, saving you time and money.
No hidden fees or surprise upcharges. The price we quote is the price you pay.
We offer warranties that protect your plumbing system —1 year on parts and 3 years on labor for new installations.
We go the extra mile to ensure no dings on your walls or scratches on your floors during repairs.
All our plumbers undergo criminal background checks and drug tests, so you can feel confident in who’s in your home.
We believe in offering pricing that reflects real value—ensuring you get the plumbing service you need without having to overpay.
Installing a pot filler involves running a cold water line behind the stove, securing the fixture to wall studs, and ensuring it meets plumbing code. It requires cutting into drywall, adding support blocking, and installing a shut-off valve for safety and pressure control. It’s a job best handled by a licensed plumber.
Yes, but it’s more complex than new construction. We carefully open the wall, locate a nearby cold water supply (usually under the sink), and run new piping to the stove. We then patch and finish the wall to make it look seamless.
The cost varies depending on access, plumbing complexity, and the fixture you choose. On average, professional installation ranges from $450 to $1,200. This includes labor, materials, and code-compliant installation. We offer upfront quotes with no hidden fees.
The standard height for a pot filler is 16 to 24 inches above the cooking surface. We adjust the height based on your stove model, backsplash design, and your personal preferences to ensure maximum convenience and aesthetic appeal.
A pot filler is typically installed centered horizontally above the stove and high enough to clear your tallest pot. Placement also depends on the stove’s width and the wall framing behind it. We determine optimal placement during our site visit.
Yes. A shut-off valve is essential for safety and plumbing code compliance. It allows you to isolate the fixture, especially during maintenance or long periods of non-use. We always install a dedicated shut-off during installation.
For many homeowners, yes. A pot filler adds convenience, prevents heavy lifting, and enhances the look of your kitchen. If you cook frequently or value premium upgrades, it’s a smart and practical luxury.
Pot fillers are connected to the cold water line only. Since the water will be heated on the stove, there’s no need for hot water supply.
Installing a pot filler involves plumbing, drywall, and code compliance—it’s not recommended as a DIY project unless you have advanced plumbing experience. Mistakes can lead to leaks and costly water damage.
Yes, plumbing code requires backflow prevention to avoid contamination of your potable water supply. We ensure all installations follow Washington State plumbing codes, including backflow compliance.
Let’s bring your vision to life with expert craftsmanship and thoughtful design.
16120 Woodinville Redmond Rd NE STE. 15
Woodinville, WA 98072
(425) 629-9564
hello@fastwaterheater.com
Monday – Friday 7:30am-5pm
24/7 Emergency Service Available
Construction
FASTWWH948BC
Plumbing
FASTWWH79901
©2025 Fast Plumbing & Drain